• By: Atari
  • Released: 1985
  • Display: Horizontal (upright only)
  • Pinout: Gauntlet Proprietary
  • CPU: MC68010, YM2151, (TMS5220 Voice Synth Chip)
  • Players: 4 (simultaneous / co-operative)
  • Identifying Marks: Top-left corner of PCB has "Atari Games, Gauntlet". Of note is the fact that there is no edge-connector for this game! Instead, the game connects to the cabinet via several smaller plugs which connect to small outlets at various locations around the PCB.
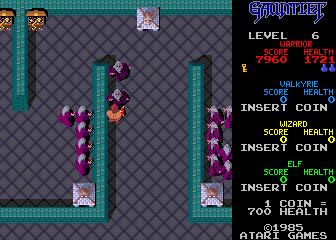
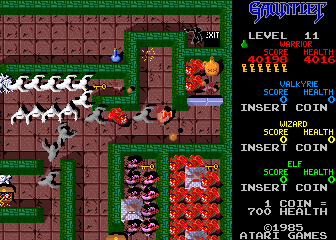
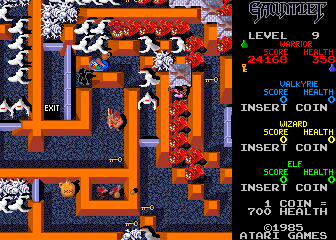
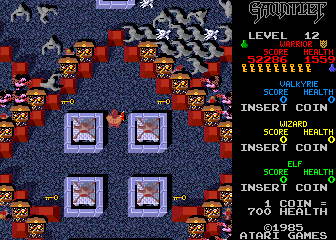
  • In Gauntlet, the gameplay is simple: Kill everything, and try to stay alive :-) Up to 4 people can play at once, and each will be a different character: Elf (Questor), Valkyrie (Thyra), Warrior (Thor), or Wizard (Merlin). (In Gauntlet-II, you may choose your character when you join, however, in Gauntlet, you are assigned a character based on the controller you choose). There are hundreds upon hundreds of levels, and no end to the game (due to on-the-fly variants to the existing levels). The game features some pretty neet voice synthesis. The chip which drives the voice-synthesis is actually the same one used in a Speak&Spell! Depositing additional quarters during play increases your health immediately.
  • Playing Gauntlet in a JAMMA Cabinet
    I have sucecssfully converted my Gauntlet PCB to operate in a JAMMA cabinet. I can not guarantee that this won't damage your PCB. All I can say is, it's working ok for me. DO THIS ENTIRELY AT YOUR OWN RISK!
    Here's what I did to make my Gauntlet PCB work in a jamma cabinet:
    • Video: You can pull the R, G, B, and Composite Sync signals from the PVID pins as follows:
      Pin 1: Red
      Pin 3: (missing)
      Pin 4: Green
      Pin 6: Blue
      Pin 8: Ground
      Pin 9: Sync
    • Joysticks: If you have a 4player Gauntlet, it's up to you how you wish to wire players 3 and 4 (or leave them disconnected). But for players 1 and two (PPL1 and PPL2), wire them like this:
      Pin 1: Ground
      Pin 2: (missing)
      Pin 3: Start (doubles as Magic button too)
      Pin 4: Fire
      Pin 7: Right
      Pin 8: Left
      Pin 9: Down
      Pin 10: Up
    • Coin Switches (PCOIN)
      Pin 1: Ground
      Pin 2: (missing)
      Pin 5: Coin2
      Pin 6: Coin1
    • Audio (PST): This is the tricky one: Gauntlet's audio is NOT amplified. Your Jamma cabinet wants amplified audio. So, you can use the Gauntlet Audio board if you have it, or if (like me) you do not have that PCB, you will have to find another way to amplify your audio. I thought of two solutions: 1) I could buy a small amplifier and use that to drive the speakers in my cabinet. 2) I could put two RCA jacks on my Gauntlet PCB so I can drive my tuner/amp that's part of my home entertainment center. Seeing as that means I have a lot more control over the audio, like having tone controls, and seeing as that was the quickest solution too, that's what I went for. Anyway, here's the pins you'll need to know about for audio:
      Pin 3: (missing)
      Pin 4: Audio Left
      Pin 6: Audio Right
      Pin 7: Ground
      NOTE: You can attach a switch (not push-button!) between Pin 2 and Pin 5 on the PST to get to the self-test and options screens.
    • Power (PPWR): This is the SCARRY one! But it's only scarry if you goof and then see smoke. Here's the pins You will want to wire to your JAMMA cabinet:
      Pin 1: Ground
      Pin 6: -5V (yes, the pin-outs for Gauntlet ask for -15V here so we're skimping it, but everything seems to work fine anyway)
      Pin 8: Ground
      Pin 9: +12V (again, kinda skimping it, the board asks for +15V but it seems to work fine for me!)
      Pin 10: +5V
      Pin 11: +5V
      Pin 12: Ground
      NOTE: Here is a diagram of the pin-orders. 1 is marked on the PCB, Use the diagram to find the others:
      +--------+
      |1 4 7 10|
      |2 5 8 11|
      |3 6 9 12|
      +--------+

      NOTE: Once you have that all wired up, GO BACK AND DOUBLE CHECK YOUR WORK!!! Next, power-up the game and QUICKY test the various power pins to make double-sure you aren't frying something. Within seconds, you should see a picture on your monitor. If you don't, then power-off quickly and look again at what you've done. I hope that doesn't happen to you!
      NOTE: The bare minimums which are required to get the game up and running (picture only) are Pins 1 & 10 of PPWR, and all the pins mentioned above for PVID. I don't know how long you should run the game in that configuration, but I did for a few minutes and it didn't seem to do any damage.
Ghost Grunt Lobber Thief Demon Death
 
Increase
Shot Speed
Increase
Shot Power
Magic
Power
Fight
Power
Increase
Armour
Increase
Speed
 
Magic
Potion
Food Food Food Food Magic
Potion
 
Invisibility Treasure Door
Key
Level
Exit