The Kodak DC290 Digital Camera
Contents
Applications
Programming The DC290
It is possible to use the GCC compiler to generate applications which run on the DC290 camera. To do this,
you must compile GCC as a cross-compiler to powerpc-elf.
Once this is complete, you should be able to build a small application to test that all's well.
See Writing GCC Programs for the Kodak DC260 for help with this step.
The idea is, to compile all your code into .O files, then link them all into one master .O file. All stdio functions are external to this file, and
are linked by the camera just before runtime as the application loads. Pretty nifty. Not all functions
may be present though, you'll need to experiment or surf the 'net to find out exactly which functions ARE supported.
Using MS-DEV in Windows as your Build-Environment
In order to do this, you must first compile GCC as a cross-compiler, using the CYGNUS release.
Once you have this configured in your C:/CrossGCC/powerpc-elf directory, you're ready to begin.
Open MS-DEV, select FILE/NEW in the menus. Select the "Projects" tab, and "WIN32 Application" from the list.
Enter a project name and choose its' location, and choose "Create New Workspace". Press OK to complete this requester.
Select "An Empty Project", and press "Finish". Your new project has been built, and you are ready to add files to it.
In the menus, select "Project, Add To Project, Files". Select the files you wish to compile, and add them to your project.
Right-click on one of your .C files in the project workspace, and select "Settings".
Under the "General" tab, select "Always Use Custom Build Step". Click on the "Custom Build" tab. In your "Outputs" window, place this:
$(OutDir)\$(InputName).o
In your "Commands" window, place this:
set COMPILE=-D_DEBUG
set path=\crossgcc\powerpc-elf\bin
set C_INCLUDE_PATH=.
set GCC=powerpc-elf-gcc
%gcc% -c %COMPILE% -o $(OutDir)\$(InputName).o $(InputPath)
You have now configured one file for compiling. You must do the same to the remaining files. (You can shift-click many files to do this to all of them simultaneously).
Now, to set-up the final linking stage. Select the main project file in your workspace, and select "Settings". Select the far-right tab, "Post-Build Step".
In the description, place "Linking...", and add these commands to the window below it:
set path=c:\crossgcc\powerpc-elf\bin
powerpc-elf-ld -r Debug/*.o -o FILENAME.CAM
To switch between debug & release of your application, set-up another configureation. Select the menu item "Build, Configurations".
Select the configureation you just set-up, and click "Add". Name your new configuration "Release", and set "Copy Settings from" to Debug.
Now, to switch between debug & release, select "Build, Set Active Configureation", and select either Release or debug. Lets configure the
Release build (it's still a copy of the Debug build environment). Copy your "Post-Build Step" from the debug configuration to the release configureation,
changing the "Debug" in the second line to "Release". Under the "General" tab, make sure your Intermediate and Output directories are also "Release" or "Debug" as
appropriate. Same for your source-files. Check their "General" tab and ensure their "Output" directory is "Release" or "Debug" as appropriate, and that their
"Custom Build Step" is clicked. Then check that their "Custom Build" tab contains commands and outputs. For your Release commands, you can change the -D_DEBUG
to -O3 to enable full optimization. That's about it! If it was confusing, email me and I'll see if I can help. The only drawback is that you don't have dependencies.
BUT, MS-DEV will only compile files you have edited, so that can really speed up developement. Also, you can manually add dependencies to files under the Settings,
"Custom Build" tab, "Dependencies" button. One final note: Why did I bother to go through all this? Well, I created an additional Configureation, "Simulation".
This configuration compiled the files like a normal WIN32 program, and pulled in an extra file too, "DC290.C" - This file contains the definitions of all functions
normally provided by the camera, and are implemented in a way which ties them into windows, transparently to the application. As far as my program knows, it thinks
it's running on the camera! This turned out to be EXTREMELY handy, no more constant uploading and testing. Just run it in Windows! It also catches more bugs, since
windows will perform an exception 0x00000005 whenever you stomp memory, but the camera will just lock-up. To do all this, I took advantage of the fact that WIN32
is only defined in the "Simulation" config, and not the others. When WIN32 is defined, a WinMain() is created which spawns a task called "entry" (yes, the one that's
the mainline for the camera), and feeds windows key events to it through the normal EM event handlers as if the camera were reporting the key events. The display
is initialized when LMEnableLCDController() is called, and is re-generated for windows every time LMSwitchBuffer() is called. The only trick to overcome, was dealing
with the fact that the camera operates in YCC color-space (not RGB!!!) To overcome this, I wrote my graphics library to be able to operate in either YCC or RGB, depending on
WIN32. [It ammounts to 3 special cases in the display code]. I also added some Gamma correction of 1.7 to match the look of the LCD a little closer. As a bonus, I was
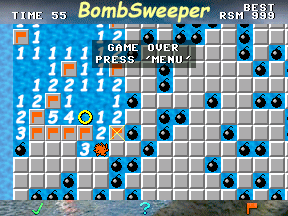
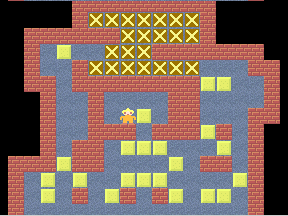
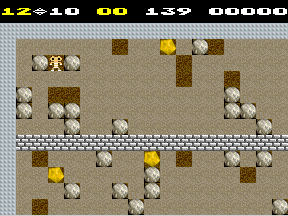
able to collect all my screenshots from the Windows Simulation using a screen-capture tool :-)
Links relating to Kodak Digital Cameras
Home Page